Drywall is an affordable, easy-to-hang material that provides fire resistance and soundproofing. It can also be customized to match a home’s style. The key to successful drywall installation is using the right tools and materials. Learn how to hang drywall and avoid common mistakes that can cause damage to the walls.
Drywall installation requires high precision and attention to detail to ensure that the finished surface is level, smooth, and free of imperfections. Hiring a professional Handyman Naperville IL can help ensure the job is done correctly and efficiently.
Drywall is a common building material used in both residential and commercial construction. It’s made from gypsum, paper and organic additives mixed with binders. Drywall comes in sheets and is fastened to the studs of a wall frame with screws. The seams between pieces are covered with tape and joint compound.
Before starting the taping and mudding process, preparing the wall for drywall installation is important. This includes inspecting the studs for any framing issues that might impede drywall installation.
If any studs are out of alignment, trim them with a saw or power planer to get them straight and square. Run the head of a hammer up and down the studs to check for stray nails or screws that might be obstructing the wall. If any are found, they should be trimmed and filled in with shims before drywall is installed.
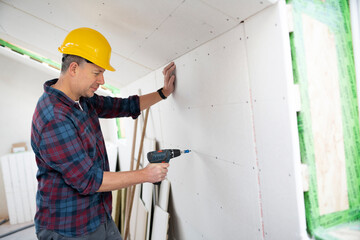
Drywall is often the first step in a remodel project. It is a relatively simple job that requires general carpentry skills, but special tools are unique to this process and can make it easier.
Hanging drywall can be a very rewarding, satisfying job that can be done on your own. It also helps you save money by reducing the number of professionals needed for your job.
To begin, measure the length of the wall and divide it by 32 for 4×8 panels or 48 for 4×12 sheets. This will help you determine how much drywall you need to cover each square foot.
Drywall finishing, or the final application of joint compound to the wall, is a time-consuming but necessary step. It requires a steady hand, attention to detail, and patience.
The major trade associations involved in gypsum board production, installation and finishing have created professional standards that break the process of drywall finishing into five distinct levels appropriate to how the wall will be used or decorated. Level 0 is the least expensive and simplest option; Level 5 is a premium finish perfect for walls with glossy enamel or non-textured flat paint or that are being painted in very low lighting conditions.
Depending on where and how the drywall will be used, each of these five levels can be specified in bids or contract documents. Specifying a particular level of finish helps architects, contractors and specifiers define what they need from you on the job.
Drywall installation isn’t the most fun part of a home improvement project, but you’ll need to clean it before you can paint or finish any other work. This is because drywall dust is airborne and can settle on doors, windows, ceilings and inside grout lines on floor tiles.
The best way to clean drywall dust is by spraying it with water. When the dust absorbs the water, it becomes weighed down and can’t float away in the air.
For this step, a shop vacuum fitted with a nozzle designed to capture microscopic drywall dust is ideal. You can also use a broom to sweep up the dust as you work.
Once you’ve finished sweeping, collect it into a trash bag and dispose of it outside. Some areas have special ordinances regarding where to dump drywall residue, so be sure to check your local codes before cleaning drywall.
Drywall is a popular material used in modern construction due to its ease of installation, durability, and fire resistance. Drywall installation is installing large drywall panels, also known as gypsum board or sheetrock, to create interior walls and ceilings. The installation process typically involves measuring and cutting the drywall to fit the dimensions of the wall or ceiling, then attaching the panels to the framing using screws or nails. The seams between the drywall panels are then covered with joint compound and tape to create a smooth surface. After the joint compound has dried, the surface can be sanded and finished with paint or texture.